Grandma's 6-Layer Magic Bars: A Timeless Potluck Favorite That Never Fails
There’s a certain magic to a recipe that transcends generations, evoking warm memories and bringing smiles to every face. For many, that recipe is none other than Grandma’s Magic Bars – a true potluck champion and an indispensable part of holiday gatherings and casual get-togethers alike. These delightful treats, often known as
six layer magic bars 6 ingredients, are beloved for their irresistible combination of sweet, salty, crunchy, and creamy textures, all brought together with astonishing ease.
As someone who cherishes the simple joy of baking for others, I can attest that these bars are a go-to for a reason. They don't demand a professional baker's skill set or a pantry full of exotic components. Instead, they celebrate the beauty of humble ingredients transforming into something truly extraordinary. Whether you're a seasoned baker or just starting your culinary journey, these magic bars promise a rewarding experience and a delicious outcome every single time. Get ready to discover why this beloved classic is about to become your new kitchen staple.
The Enduring Appeal of Grandma's Magic Bars
Imagine walking into a potluck with a platter of these golden-brown beauties. Before you even set them down, the sweet aroma of toasted coconut and melted chocolate begins to waft, drawing curious glances and eager anticipation. That's the power of Grandma's Magic Bars. They carry a nostalgic charm, often reminding people of childhood and simpler times, when a simple dessert could create lasting memories.
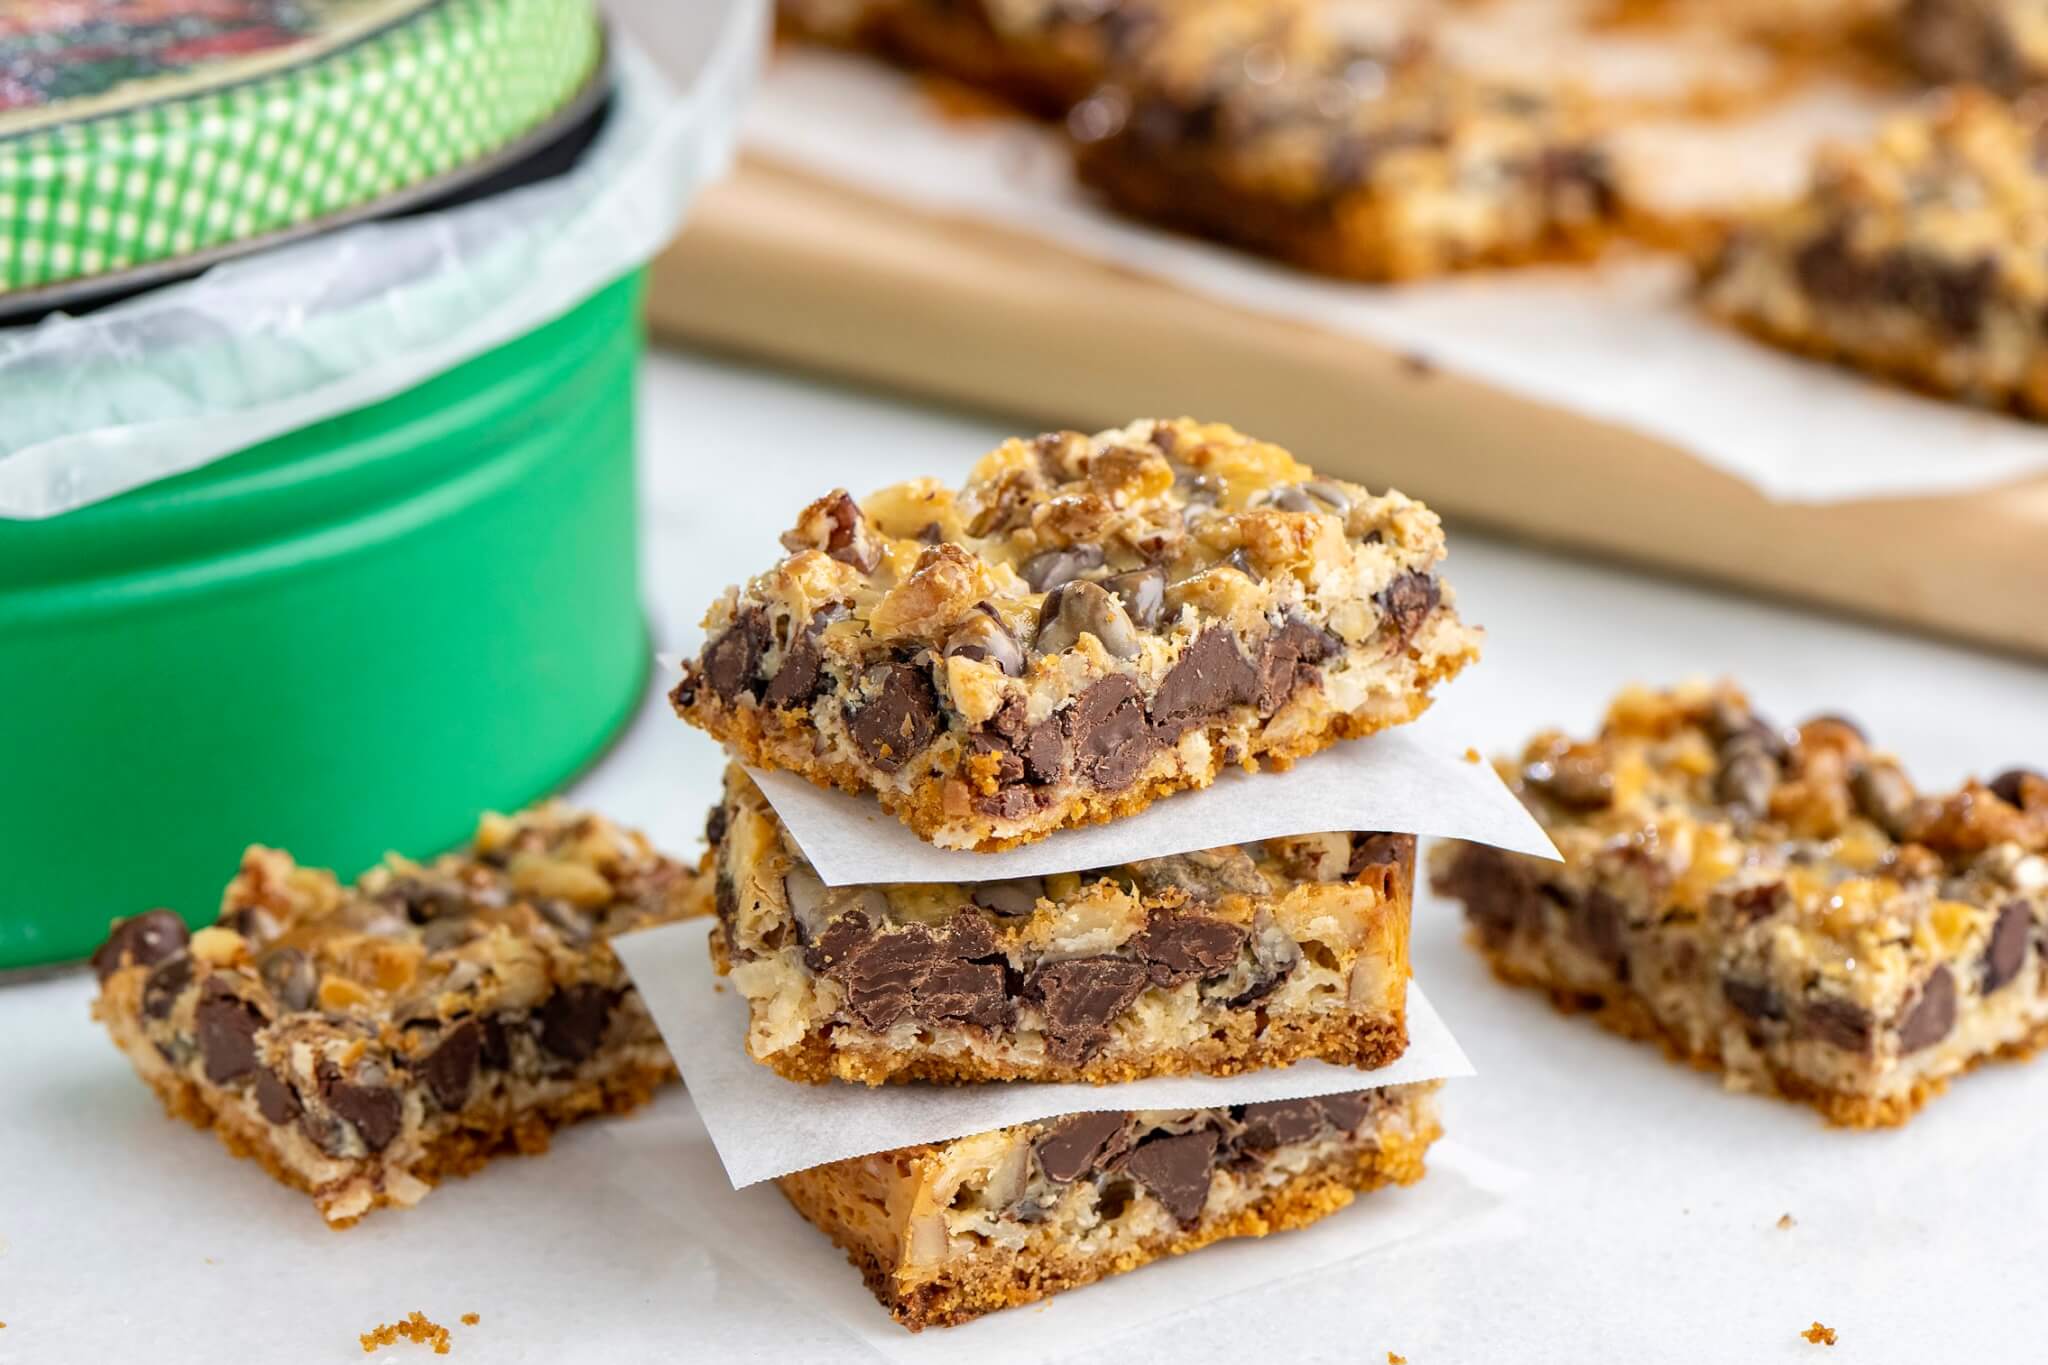
What truly makes these bars a "potluck favorite" isn't just their incredible taste, but their practicality. They travel wonderfully, require no refrigeration for serving, and are universally adored by kids and adults alike. There’s a beautiful symphony in each bite: the crisp foundation of graham cracker, the rich chew of chocolate and butterscotch, the exotic sweetness of coconut, all bound together by a luscious layer of sweetened condensed milk. This delightful contrast of flavors and textures ensures that every piece is an adventure for the taste buds. It’s a treat that feels both decadent and comforting, a true testament to the simple brilliance of the
six layer magic bars 6 ingredients concept. They’re not just a dessert; they’re a warm hug in bar form, ready to be shared.
Unveiling the Magic: What Makes These Bars So Special?
The "magic" in magic bars lies in their straightforward assembly and the incredible transformation of simple ingredients into a complex flavor profile during baking. Unlike many elaborate desserts, the process of creating these bars is almost meditative. You're simply layering components, allowing the oven to work its enchanting spell.
Here's the breakdown of what makes them so captivating:
*
Effortless Assembly: The preparation truly takes mere minutes, making them perfect for busy parents, students, or anyone needing a quick dessert fix. You don't need fancy equipment or advanced techniques.
*
Layers of Delight: Each of the six distinct layers contributes to a cohesive, satisfying bite. The graham cracker crust provides a buttery crunch, the chocolate chips and butterscotch chips melt into gooey pockets of sweetness, the shredded coconut adds texture and a tropical note, and the sweetened condensed milk acts as the binding agent, caramelizing slightly and creating that signature chewy, golden top.
*
Nutritional Nuances: While undoubtedly a treat, these bars aren't entirely devoid of goodness. The coconut contributes a healthy dose of fiber, and if you choose to add nuts (a common variation!), you'll get healthy fats and protein. It's a sweet snack that, surprisingly, offers a little something extra.
*
Time-Saving Treasure: With a prep time of about 15 minutes and a bake time of around 28 minutes, you can have a batch of these delectable bars ready in under an hour. This efficiency is invaluable when you need a crowd-pleasing dessert on short notice.
The result is a bar cookie that's equal parts sweet, salty, crunchy, and creamy – a harmonious blend that keeps everyone reaching for another piece.
Your Six Layer Magic Bars 6 Ingredients: Pantry Staples to Perfection
The beauty of these magic bars lies in their reliance on incredibly simple, universally available ingredients. When we talk about
six layer magic bars 6 ingredients, we're focusing on the core components that create their iconic taste and texture. While many recipes might include a seventh ingredient like nuts, the foundation of these bars can absolutely be built on these six essential items:
1.
Melted Butter: The golden base that binds the crust together, providing a rich, savory counterpoint to the sweetness.
2.
Graham Cracker Crumbs: The classic foundation, offering a subtly spiced crunch.
3.
Sweetened Condensed Milk: The true "magic" ingredient! This binds all the layers, caramelizes beautifully, and ensures a moist, chewy texture.
4.
Semi-Sweet Chocolate Chips: Delivering that essential deep chocolatey goodness.
5.
Butterscotch Chips: Adding a unique, buttery, and slightly salty sweetness that pairs perfectly with chocolate.
6.
Shredded Coconut: Toasted to perfection, it provides texture, flavor, and that quintessential magic bar aroma.
These six ingredients, when layered and baked, undergo a wonderful transformation, creating a treat that feels much more complex than its simple components suggest. It’s a testament to how humble pantry staples can combine to create pure joy.
Beyond the Basics: Customization & Dietary Adaptations
One of the most remarkable aspects of magic bars is their incredible adaptability. While the core
six layer magic bars 6 ingredients provide a perfect baseline, you can easily customize them to suit various tastes or dietary needs without sacrificing that irresistible flavor.
*
Vegan Twist: For a plant-based version, simply swap out the butter for plant-based margarine or coconut oil, and use dairy-free chocolate and butterscotch chips. There are also excellent vegan sweetened condensed milk alternatives available!
*
Gluten-Free: A simple swap of gluten-free graham cracker crumbs for the regular ones is all it takes to make these bars suitable for those avoiding gluten.
*
Nut-Free: If allergies are a concern, simply omit any nuts. The core six ingredients are naturally nut-free (always double-check product labels for cross-contamination, especially with chips and coconut).
*
Flavor Adventures: Don't be afraid to experiment! Try white chocolate chips, peanut butter chips, or even chopped candies like M&M's or Heath bars. A sprinkle of chopped pecans, walnuts, or even pretzels can add another layer of crunch and flavor.
The possibilities are endless, ensuring that everyone can enjoy a slice of this timeless dessert. For even more creative ideas and specific ingredient swaps to cater to different dietary preferences, check out our guide on
Customizable Six Layer Magic Bars for Any Dietary Need.
Crafting Your Own Batch: Step-by-Step to Deliciousness
Making Grandma’s 6-Layer Magic Bars is a wonderfully straightforward process, making them an ideal recipe for bakers of all skill levels. It's less about technique and more about assembly, leading to a truly satisfying creation.
Here’s a simplified overview to guide you:
1.
Preheat & Prepare: Start by preheating your oven to the recommended temperature (usually around 350°F or 175°C). Line a 9x13 inch baking pan with parchment paper, leaving an overhang on the sides. This ensures easy removal and clean-up.
2.
Crust Creation: Combine melted butter with graham cracker crumbs. Press this mixture firmly and evenly into the bottom of the prepared pan. This forms the sturdy, buttery base.
3.
Layer the Goodness: Systematically layer your chosen ingredients over the crust. Typically, this means scattering chocolate chips, then butterscotch chips, followed by shredded coconut. Each layer adds to the visual appeal and flavor complexity.
4.
Pour the Magic: Evenly pour the sweetened condensed milk over all the layers. This is where the "magic" happens, as the milk will seep down, binding everything together and caramelizing beautifully during baking.
5.
Bake to Perfection: Place the pan in the preheated oven and bake for about 25-30 minutes, or until the edges are golden brown and the center is set and slightly bubbly.
6.
Cool & Cut: This is arguably the hardest step – patience! Allow the bars to cool completely in the pan on a wire rack before attempting to cut them. Cooling is crucial for clean, neat slices. Once fully cooled, use the parchment paper overhang to lift the entire slab out of the pan, then cut into squares or rectangles.
This simple process yields approximately 24 generous bars, perfect for sharing, gifting, or simply enjoying yourself. The total hands-on prep time is around 15 minutes, with an additional 28 minutes for baking, making it an incredibly efficient way to produce a beloved dessert.
Pro Tips for Perfect Magic Bars Every Time
To ensure your magic bars turn out absolutely perfect, here are a few insider tips:
*
Don't Skimp on the Press: Ensure your graham cracker crust is pressed down very firmly. A glass or the bottom of a measuring cup works wonders for this, creating a solid base that won't crumble.
*
Even Distribution: Try to distribute your chips and coconut as evenly as possible. This ensures every bite gets a taste of all the delicious layers.
*
Quality Ingredients: While simple, the quality of your ingredients matters. Good chocolate chips and fresh coconut will elevate the flavor significantly.
*
Cool Completely: I cannot stress this enough – resist the urge to cut warm bars! They will be gooey and fall apart. Allowing them to cool for at least 2-3 hours, or even chilling them in the refrigerator, will make for perfectly clean cuts and a firm texture.
*
Sharp Knife: Use a sharp, non-serrated knife for cutting. Wiping the knife clean between cuts can also help create cleaner edges.
*
Storage: Store magic bars in an airtight container at room temperature for up to 3-4 days, or in the refrigerator for up to a week. They also freeze beautifully for longer storage!
Conclusion: The Undeniable Charm of a Timeless Classic
Grandma's 6-Layer Magic Bars truly earn their name. They are a testament to the fact that baking doesn't have to be complicated to be utterly delicious and deeply satisfying. With their simple preparation, pantry-friendly ingredients, and irresistible blend of textures and flavors, these bars have rightfully earned their place as a timeless potluck favorite and a treasured family recipe. They bring people together, spark fond memories, and consistently deliver that comforting, homemade goodness we all crave.
Whether you're looking for a quick and easy dessert for a last-minute gathering, a delightful treat for your family, or a nostalgic taste of home, these magic bars are the answer. So, gather your six simple ingredients, follow these straightforward steps, and prepare to be enchanted by the magic. For a more detailed, step-by-step recipe, be sure to check out our
Easy 6-Ingredient Magic Bars: Quick & Simple Recipe and bring a little bit of Grandma's magic into your own kitchen today!